Top 10 Lighting Guide Tips for Property Developers

Time:2026-10-08 Author:Sophia
0%

Lighting decisions can shape a property long before residents notice the flooring or paintwork. A well-planned scheme supports safety, comfort, energy performance, and the development’s market appeal. This Lighting Guide For Property Developers explores ten practical tips for making those decisions with greater confidence.

Good lighting begins with the building’s purpose, layout, and daily routines. A warm entrance lobby may create reassurance, while focused corridor lighting can improve wayfinding without producing harsh glare. In a residential kitchen, layered illumination should support food preparation, cleaning, and relaxed evening use. On a commercial site, lighting must respond to working patterns, visibility needs, maintenance access, and changing occupancy.

Details matter.

Experienced project teams usually review daylight levels, ceiling heights, surface finishes, controls, and fixture positions together. They also coordinate early with architects, electrical consultants, contractors, and facilities managers. This reduces expensive changes after ceilings are closed. Reliable guidance should reflect recognised building standards, manufacturer data, energy targets, and local professional advice. Product claims alone are not enough.

A perfect lighting plan is unlikely. Budget pressure, late design changes, and limited service zones can force compromises. The important question is whether those compromises remain safe, practical, and measurable. A cheaper fitting may create higher maintenance costs later. A stylish fixture may perform poorly in a demanding environment. These ten tips will help property developers assess such choices carefully, from initial concept to final inspection, while leaving room for testing, feedback, and improvement.
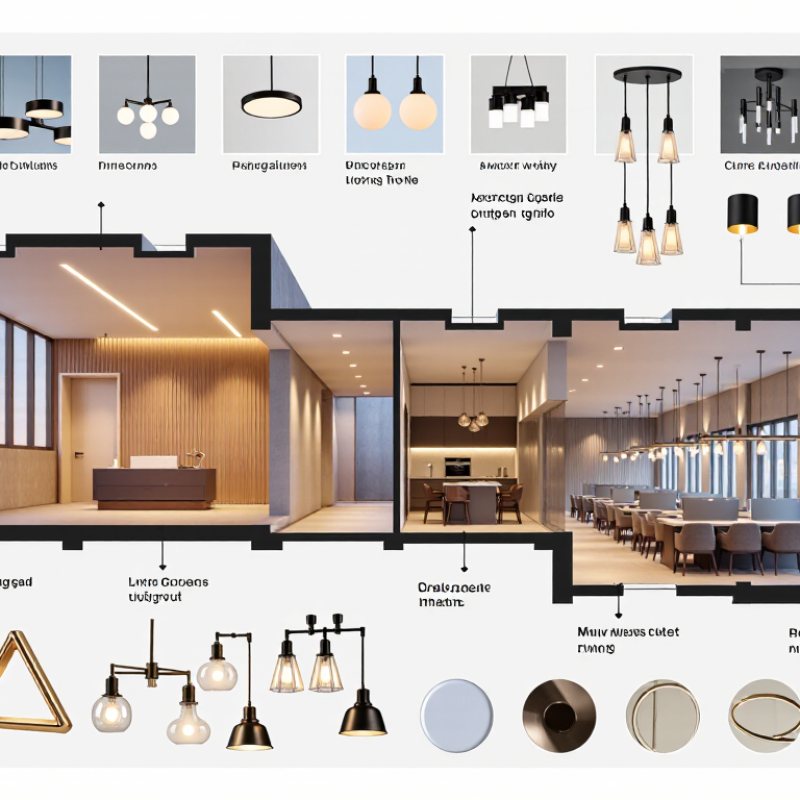
Top 10 Lighting Guide Tips for Property Developers

Define Lighting Goals for Each Property Area

Top 10 Lighting Guide Tips for Property Developers

Define Lighting Goals for Each Property Area

Lighting should begin with the property’s purpose, not with fixture selection. A reception area needs clear facial lighting, calm ambience, and safe movement. Corridors require even illumination without harsh glare. In residential kitchens, bright task lighting helps residents prepare food safely. Bedrooms need softer layers that support rest rather than constant brightness.

Walk through the space at different times.

Natural light changes the decision. Observe shadows near windows, staircases, worktops, and seating areas. I often test temporary lamps before approving a final layout. This reveals dark corners that drawings may miss. Colour temperature also affects perception. Warmer light can make lounges feel comfortable, while neutral light may suit offices and bathrooms. However, one setting rarely works everywhere. A common mistake is using identical fittings across every room for visual consistency. It can create a flat, uncomfortable experience.

Define measurable goals for each zone. Set target brightness, glare limits, switching methods, and maintenance access. Include residents, cleaners, facility teams, and accessibility needs in the review. A beautiful fitting is not practical if replacing its lamp requires specialist equipment. Energy performance matters too, but reducing power alone should not create dim corridors or unsafe steps. I have seen plans that looked efficient on paper and disappointing after installation. Review the result with real users, then adjust where the evidence demands it.

Top 10 Lighting Guide Tips for Property Developers: Define Lighting Goals for Each Property Area

Set lighting targets according to how each space is used. The chart shows typical maintained illuminance levels, measured in lux, for common residential and mixed-use property areas.

Higher illuminance is recommended for task-focused areas such as kitchens, home offices, and reception spaces, while bedrooms, corridors, and outdoor paths generally require lower levels for comfort, orientation, and energy efficiency.

Assess Natural Light and Building Orientation

Top 10 Lighting Guide Tips for Property Developers

Assess Natural Light and Building Orientation

Natural light should be assessed before the building form is fixed. Visit the site at different hours, not only during a bright morning. Record shadows from nearby buildings, trees, balconies, and boundary walls. A simple sun-path study can reveal overlooked dark zones.

Building orientation strongly affects comfort, energy use, and interior value. In many climates, controlled southern exposure can provide useful daylight, while western glazing may create harsh afternoon glare and overheating. However, local conditions matter more than general rules. Window size, room depth, surrounding materials, and seasonal sun angles must be reviewed together.

Test real spaces.

During early design, compare daylight simulations with physical observations from the site. Check bedrooms, kitchens, corridors, and work areas separately. A bright living room does not compensate for a permanently dim entrance hall. Specify external shading where summer sun is intense, and avoid relying on blinds as the only solution. Residents may leave them closed, reducing the daylight developers expected.

I once approved a layout that looked efficient on paper, but a neighboring block blocked winter light. That mistake changed my review process. Now, I study future development risks and inspect the site under cloudy conditions too. Perfect assumptions are uncommon. A reliable lighting strategy leaves room for weather, maintenance, and human behavior.

Top 10 Lighting Guide Tips for Property Developers – Assess Natural Light and Building Orientation

No. Lighting Focus What to Assess Useful Measurement or Reference Recommended Development Response Best Stage
1 Building Orientation Review the site latitude, solar path, surrounding buildings, trees and potential future obstructions before fixing the main building axis. In the Northern Hemisphere, south-facing façades generally receive the most consistent annual solar exposure; north-facing façades usually receive the least direct sunlight. Orient primary living, working or communal spaces toward the most useful daylight exposure while considering overheating, glare and local planning constraints. Site appraisal
2 Sun-Path Analysis Map morning, midday and afternoon sun at the summer and winter solstices, including shadows cast by nearby structures. Solar altitude and azimuth vary by location and date; a site-specific sun-path diagram is more reliable than a generic compass assumption. Use verified solar studies to position façades, balconies, courtyards and circulation spaces, and to identify areas requiring shading. Concept design
3 Window-to-Wall Ratio Compare glazing area with room depth, façade orientation, window position and the thermal performance of the proposed envelope. A larger glazed area can improve daylight but may also increase heat loss, solar gains and glare. The appropriate ratio depends on climate, orientation and energy modelling. Optimise glazing by façade rather than applying one percentage across the entire building; combine windows with insulation, low-emissivity glazing and external shading. Developed design
4 Room Depth and Daylight Reach Check whether daylight can reach the back of each occupied room, especially in deep-plan apartments, offices and retail units. Daylight levels normally reduce as distance from the window increases. Room depth, ceiling height, window head height and interior reflectance all affect the result. Limit excessive room depth where practical, raise window head heights, use clerestory glazing or introduce atria and light wells in deeper plans. Space planning
5 Daylight Performance Model daylight availability for representative rooms under local sky conditions rather than relying only on window size. For early comparison, daylight factor is commonly expressed as the percentage of outdoor illuminance received indoors under an overcast sky. Current standards may also use climate-based metrics such as sDA and ASE. Set project-specific daylight targets based on room use and applicable regulations, then test annual daylight, glare and overheating together. Design development
6 External Shading Identify façades and windows exposed to high-angle summer sun or low-angle morning and afternoon sun. Horizontal overhangs are generally effective against higher-angle sun, while vertical fins can help control lower-angle sunlight from the east and west. Prioritise external shading before internal blinds where feasible, and coordinate shading geometry with views, ventilation, maintenance and façade safety. Façade design
7 Glare Control Assess bright sky views, reflected sunlight, exposed façades and high contrast between windows and interior surfaces. Glare risk is influenced by window luminance, occupant view direction, solar position, surface reflectance and shading control; it cannot be judged by illuminance alone. Use adjustable blinds, fins, light shelves, diffusing glazing or automated controls, while preserving occupants’ ability to override systems. Performance design
8 Surface Reflectance Review the colours and finishes of ceilings, walls, floors and external surfaces that influence the distribution of daylight. Light-coloured, matte surfaces generally reflect more light and reduce visual contrast; highly glossy finishes can create reflected glare. Use relatively light, non-glossy ceilings and upper wall finishes to distribute daylight deeper into rooms without relying on excessive glazing. Interior design
9 Toplighting and Shared Spaces Consider whether roofs, atria, stairwells and communal areas can provide useful daylight without creating excessive solar gain. Toplighting can deliver daylight deeper into a plan than a side window, but roof glazing requires careful control of heat gain, glare, weathering and maintenance. Use rooflights, atria or clerestories selectively, with diffusing elements, shading and ventilation strategies suited to the local climate. Concept design
10 Daylight and Electric Lighting Integration Coordinate daylight zones with the electric-lighting layout, occupancy patterns and control strategy. Daylight-linked dimming can reduce unnecessary electric-light use when correctly commissioned; savings depend on occupancy, controls, room use and available daylight. Place lighting circuits in perimeter and interior zones, specify occupancy and daylight sensors where appropriate, and verify settings during commissioning. Technical design

Note: The benchmarks are general design guidance. Final decisions should be verified against the project location, climate, local planning requirements, applicable daylight standards, energy model and occupant needs.

Select Efficient Fixtures, Controls, and Color Temperatures

Property developers should treat lighting as an operating-cost decision, not a decorative finish. The International Energy Agency reports that lighting uses about 15% of global electricity. Efficient LED fixtures can reduce lighting energy by up to 75% and last roughly 25 times longer than incandescent lamps, according to the U.S. Department of Energy. However, poor glare control can make an efficient building uncomfortable.

Tips: Specify fixtures by delivered lumens, efficacy, glare rating, service life, and maintenance access. Review photometric layouts before procurement. A bright showroom sample can hide dark work surfaces or harsh reflections. IES guidance supports task-based illumination rather than excessive brightness everywhere. In real projects, lighting calculations still need site verification. Drawings are not reality.

Controls should match how people use each space. Occupancy sensors suit meeting rooms and storage areas. Daylight dimming suits perimeter offices and atriums. The U.S. Department of Energy identifies lighting controls as a practical route to major energy savings, although results depend on commissioning and occupant acceptance. Keep manual overrides simple. Complicated controls are often ignored.

Tips: Select color temperatures by function and material palette. Warm 2700–3000K can support hospitality areas. Neutral 3500–4000K may suit offices and circulation zones. Avoid choosing one temperature for an entire development. The WELL Building Standard and professional lighting guidance emphasize visual comfort, glare reduction, and occupant needs. Color appearance also changes finishes; test samples beside actual stone, timber, and paint. This step is easy to skip, and regrettably, it often is.

Plan Electrical Layouts for Safety, Flexibility, and Maintenance

Property developers should design electrical layouts around safety, flexibility, and maintenance, not only appearance.

The U.S. National Fire Protection Association reports that electrical distribution and lighting equipment were involved in about 31,900 home structure fires annually from 2016 to 2020. These incidents caused roughly 470 civilian deaths and 1,100 injuries. Separate lighting circuits from high-load equipment, label every distribution board, and provide accessible isolation points. Keep emergency lighting, exit signs, and life-safety systems on suitable protected circuits.

Flexibility begins before the walls close.

Use coordinated ceiling plans, spare conduits, and accessible junction boxes near likely partition changes. Leave room. Provide extra capacity in risers and panels, but avoid careless oversizing.

The International Energy Agency estimates that lighting uses around 15% of global electricity consumption. The U.S. Department of Energy states that LED systems can use at least 75% less energy and last up to 25 times longer than traditional lamps. Still, efficiency depends on controls, ventilation, drivers, and actual occupancy patterns.

Maintenance details deserve equal attention.

Group lighting zones logically, record cable routes, and place equipment where technicians can work without removing ceilings. Specify replaceable components and keep a digital asset schedule with circuit references, test dates, and warranty information.

I have seen attractive projects become difficult to service because access panels were treated as an afterthought.

A perfect drawing rarely survives construction. Review the layout with electricians, facility managers, and fire-safety professionals before approval. Test controls under realistic conditions, including daylight, empty rooms, cleaning access, and future tenant changes.

Balance Lighting Quality, Budget, and Long-Term Property Value

Top 10 Lighting Guide Tips for Property Developers

Balance lighting quality, budget, and long-term property value by treating lighting as infrastructure, not decoration. The International Energy Agency reports that lighting uses about 15% of global electricity. Efficient planning matters. Start with daylight mapping, then add ambient, task, and accent layers. Select efficient LED systems with suitable colour rendering and replaceable components. The U.S. Department of Energy notes that LEDs can use at least 75% less energy and last up to 25 times longer than incandescent lamps. Check the figures carefully.

Use occupancy sensors, daylight dimming, and separate controls for unused zones. Keep corridors safe without flooding them with light. Review glare near windows, glossy floors, and computer screens. A small mock-up room can reveal problems that drawings miss. Ask maintenance teams about access, cleaning, driver replacement, and spare-part availability. Low purchase prices can become expensive after repeated failures. They often do.

Measure lighting power density and estimated annual energy use before approving the design. Compare capital cost with electricity, maintenance, and replacement costs over the building’s expected life. The U.S. Energy Information Administration’s Commercial Buildings Energy Consumption Survey identifies lighting as a significant commercial electricity end use, reinforcing the value of efficient controls. Avoid over-lighting speculative spaces; tenants may later redesign them. Document assumptions, test the controls, and revisit them after occupancy. Not every premium fixture improves property value. Comfort, reliability, and manageable operating costs usually matter more.

FAQS

Why should natural light be assessed before fixing the building form?

Building form controls daylight, shadows, comfort, and energy use. Visit the site at morning, afternoon, and cloudy periods. Record shadows from trees, balconies, walls, and nearby buildings. Perfect assumptions fail.

How does building orientation affect indoor comfort?

Orientation changes sunlight, glare, overheating, and room value. Controlled southern exposure may help in some climates. Western windows can create harsh afternoon heat. Local conditions matter more than general rules.

What details should be reviewed with window size?

Review window size, room depth, surrounding materials, and seasonal sun angles together. Large windows do not guarantee useful daylight. A deep room may still have a dim rear area.

Which spaces need separate daylight testing?

Test bedrooms, kitchens, corridors, entrances, and work areas separately. A bright living room cannot fix a dark entrance hall. Test real spaces.

Why should designers avoid relying only on blinds?

Residents may keep blinds closed during bright or hot periods. This can reduce the daylight developers expected. External shading often provides a more dependable response.

What electrical planning choices improve safety and future flexibility?

Separate lighting circuits from high-load equipment. Label distribution boards clearly. Provide accessible isolation points and suitable protected circuits for emergency systems. Leave room.

How can electrical layouts become easier to maintain?

Record cable routes and group lighting zones logically. Place equipment where technicians can work without removing ceilings. Use accessible junction boxes and replaceable components. Attractive layouts sometimes fail here.

How can lighting systems reduce energy use without creating new problems?

Efficient lighting can use much less electricity and last longer than older lamps. Actual savings depend on controls, ventilation, drivers, and occupancy. Test daylight sensors in empty rooms and occupied spaces.

What should be reviewed before approving the lighting and electrical design?

Review the design with electricians, facility managers, and fire-safety professionals. Test cleaning access, daylight conditions, controls, and future partition changes. I once trusted a neat drawing too much.

Conclusion

A Lighting Guide For Property Developers should begin by defining clear lighting goals for every area of a property, from welcoming entrances and productive workspaces to relaxing residential interiors and functional outdoor zones. Developers should assess natural light, window placement, and building orientation before selecting fixtures, helping create comfortable spaces while reducing unnecessary energy use. Efficient fixtures, suitable controls, and carefully chosen color temperatures can further improve atmosphere, usability, and operating performance.

Electrical layouts should be planned with safety, flexibility, accessibility, and future maintenance in mind. Well-positioned switches, outlets, sensors, and service points can support changing tenant needs and simplify repairs. Ultimately, successful lighting design balances visual quality with budget considerations and long-term property value. A thoughtful approach can enhance occupant comfort, strengthen the overall appeal of a development, control operating costs, and support durable, adaptable spaces without compromising practical performance.

Sophia

Sophia

Sophia is a dedicated marketing professional with an exceptional depth of knowledge about her company's products and services. With a keen understanding of market trends and customer needs, she crafts insightful blog posts that not only inform but also engage readers, enriching the company’s online......