How to Choose Lighting Solutions for Large Spaces in 2026? This question now reaches beyond brightness, fixtures, and energy bills. Large warehouses, airports, exhibition halls, and sports facilities need lighting that supports movement, safety, comfort, and changing activities. The right Lighting Solutions For Large Spaces should make a 20-meter ceiling feel controlled, not cavernous.
Howard M. Brandston, a respected architectural lighting designer and educator, once said, “Lighting is not about seeing, it is about being seen.” His principle remains valuable in large environments. Good planning considers beam distribution, glare control, color quality, daylight, maintenance access, and intelligent dimming. A loading area may need strong vertical illumination, while a public atrium may require softer layers across walls, floors, and signs. One fixture rarely solves everything.
In 2026, connected LED systems can adjust output through occupancy sensors, daylight monitoring, and scheduling. Yet automation is not automatically better. Poor sensor placement can leave aisles dim or create distracting changes. I have also seen projects prioritize impressive efficiency figures while ignoring visual fatigue. That is a costly mistake. Selection should begin with the space’s actual users, ceiling height, surface finishes, operating hours, and maintenance realities. Test lighting at night. Watch reflections on polished floors. Ask whether people can read faces clearly. Some decisions will remain imperfect, but careful measurement, mock-ups, and professional review create a more reliable foundation.
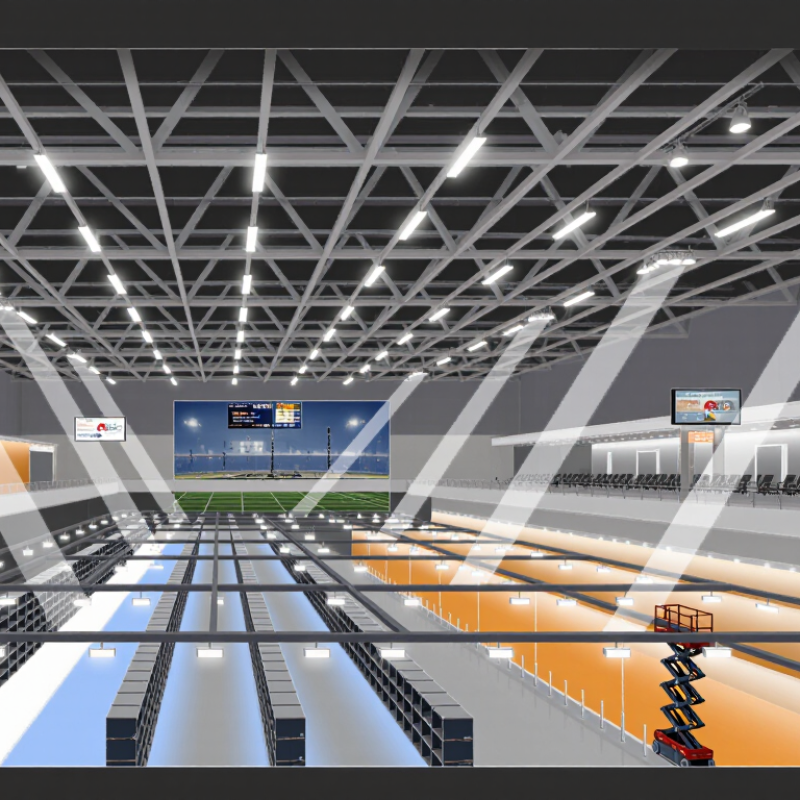
Defining lighting needs for large spaces in 2026 starts with observing how people use the room. A warehouse aisle needs clear vertical light, while an exhibition hall needs controlled brightness and accurate color. Measure floor height, task locations, daylight levels, and viewing angles before selecting fixtures. A lux meter helps, but real observations matter too. Workers may still report glare beside a technically compliant installation.
Energy performance now depends on controls, not fixtures alone. Occupancy sensors can reduce output in quiet zones. Daylight response can soften lighting near skylights and windows. Tunable white systems may support different activities, from detailed assembly to evening cleaning. Check color rendering, flicker performance, glare ratings, maintenance access, and emergency requirements. Local regulations and a qualified lighting professional should guide final decisions. My first draft often overestimates brightness. More light is not always better.
Tips: Walk through the space during busy and quiet periods. Photograph dark corners and reflective surfaces. Ask users where their eyes feel tired. Keep a simple lighting map. Test one zone before expanding the design. A small trial may reveal shadows, delayed sensors, or distracting reflections from polished floors. Use measured results and user feedback together. Safety, comfort, operating cost, and future flexibility should shape the lighting brief.
Large spaces need more than maximum brightness.
They need controlled distribution, manageable glare, and reliable maintenance access. The International Energy Agency reports that lighting uses roughly 15% of global electricity. That figure makes technology selection a financial decision, not merely an architectural one.
LED systems usually provide higher efficacy, instant starting, and precise dimming. The U.S. Department of Energy’s 2022 lighting forecast projected LEDs could reach about 87% of installed U.S. lighting by 2035.
For warehouses and sports halls, high-bay fixtures concentrate light over tall ceilings. Linear fixtures suit aisles and open production areas.
Large panels create softer illumination in offices, but they can look flat when ceiling height changes. Indirect fixtures reduce harsh shadows, although they need brighter ceilings and careful surface planning.
Controls can reduce waste further. Occupancy sensors work well in storage zones with irregular movement. Daylight harvesting helps near skylights, but poor calibration creates distracting brightness shifts.
I have seen efficient fixtures fail because maintenance teams could not reach them safely. That detail is easy to overlook.
The DesignLights Consortium has repeatedly emphasized verified performance, controllability, and quality documentation in commercial lighting evaluation.
Still, published efficacy is not the whole story. Dust, mounting height, beam angle, and driver replacement influence real results.
A small mock-up, measured at floor level, often reveals more than a polished specification sheet.
Large spaces need a lighting plan before fixture selection. Start with the visual task, ceiling height, surface reflectance, and daylight direction. EN 12464-1:2021 commonly benchmarks 500 lux for office work and 300 lux for general circulation. These figures are useful, but they are not universal answers.
Measure the room in zones. A 60-metre hall may need brighter light near entrances, stairs, and information points. Keep quieter areas softer. The IES Lighting Handbook recommends evaluating illuminance, uniformity, and glare together. One number cannot describe comfort. In practice, I often begin with a simple grid, then test sightlines from seated and standing positions. My first layouts sometimes look balanced on paper. They can still create bright patches on polished floors.
Visual comfort depends strongly on contrast. CIE 117 explains glare evaluation through unified glare rating, or UGR. For many office tasks, a UGR below 19 is used as a practical benchmark under EN 12464-1. Check it from real viewing positions, not only from the floor plan. Use layered lighting: ambient illumination, focused task light, and carefully controlled vertical light. The WELL Building Standard also emphasizes glare control and access to quality daylight. A dimmer wall can feel calmer than a brighter ceiling. That detail is easy to miss. Recheck the design after furniture, screens, signs, and shelving are installed. Their surfaces change the visual field.
| Large-Space Application | Maintained Illuminance | Uniformity (U0) |
Recommended CCT | Minimum CRI | Glare Target | Layout and Mounting Approach | Control Strategy | Planning and Comfort Notes |
|---|---|---|---|---|---|---|---|---|
| Open-Plan Office | 300–500 lux | ≥ 0.60 | 3500–4000 K | ≥ 80 | UGR ≤ 19 | Use regularly spaced direct or direct/indirect luminaires. Position fixtures parallel to computer screens and coordinate spacing with ceiling height. | Daylight dimming, occupancy sensing, scene control, and personal task-lighting options. | Limit high-angle brightness and reflected glare on screens. Use indirect light to improve ceiling brightness and visual comfort. |
| Warehouse and Distribution Area | 100–200 lux | ≥ 0.40 | 4000–5000 K | ≥ 70 | UGR ≤ 25 | Install narrow-beam high-bay fixtures in continuous rows aligned with aisles. Select optics according to mounting height and rack geometry. | Occupancy or aisle sensors, scheduled dimming, and daylight harvesting near rooflights or perimeter zones. | Verify vertical illumination on rack labels and avoid excessive contrast between aisles, storage faces, and circulation areas. |
| Retail Sales Floor | 300–750 lux | ≥ 0.40 | 3000–4000 K | ≥ 80; ≥ 90 for color-critical goods | UGR ≤ 22 | Combine ambient lighting with adjustable accent luminaires. Use track or recessed spots to create focal points without over-lighting circulation paths. | Scene presets for trading hours, cleaning, merchandising, and after-hours security. | Choose spectral quality based on products. Control sparkle, reflections, and direct views of bright sources from customer sightlines. |
| Manufacturing and Assembly Area | 300–750 lux | ≥ 0.60 | 4000–5000 K | ≥ 80 | UGR ≤ 22 | Use robust high-bay or linear industrial luminaires over work zones. Add localized task lighting where precision, inspection, or fine assembly is required. | Occupancy-based zoning, machine-state integration where appropriate, and reduced output during inactive periods. | Coordinate light direction with machinery and operator viewing angles. Minimize stroboscopic effects and maintain clear vertical visibility. |
| Sports Hall and Multi-Purpose Court | 300–750 lux | ≥ 0.70 | 4000–5000 K | ≥ 80 | UGR ≤ 22 | Mount impact-resistant luminaires above or beside the playing area. Use shielding and carefully aimed optics to protect players from direct glare. | Preset scenes for training, competition, cleaning, broadcasting, and emergency operation. | Consider flicker performance for high-speed movement and cameras. Avoid visible bright sources within typical upward viewing angles. |
| Exhibition and Event Hall | 200–500 lux | ≥ 0.50 | 3000–4000 K | ≥ 80; ≥ 90 for artwork | UGR ≤ 22 | Use flexible grid-based lighting with independently controllable zones. Provide adaptable track, pendant, or high-bay systems for changing layouts. | Addressable dimming, scene recall, daylight response, and temporary event-control integration. | Design for reconfiguration. Separate general, feature, circulation, and service lighting so energy use matches the event layout. |
| Airport, Station, or Transit Concourse | 200–300 lux | ≥ 0.50 | 3500–4500 K | ≥ 80 | UGR ≤ 22 | Use continuous linear or modular ceiling systems to support wayfinding. Increase vertical illumination around signs, information points, and ticketing areas. | Time scheduling, daylight harvesting, occupancy-based reduction, and emergency-lighting integration. | Prioritize clear facial recognition, readable signage, comfortable transitions, and consistent illumination across large circulation zones. |
| Indoor Parking Garage | 75–150 lux | ≥ 0.40 | 4000–5000 K | ≥ 70 | UGR ≤ 25 | Place linear or continuous fixtures along driving lanes and pedestrian routes. Use durable, sealed luminaires suited to dust, moisture, and vehicle impact risks. | Presence detection, daylight-linked dimming near openings, and defined minimum safety levels during low occupancy. | Avoid abrupt bright-dark transitions at entrances and ramps. Provide sufficient vertical illumination for people, vehicles, and security cameras. |
| Healthcare Public Area | 200–300 lux | ≥ 0.60 | 3000–4000 K | ≥ 80 | UGR ≤ 19 | Use softly distributed ceiling light with additional illumination at reception, waiting, and circulation decision points. | Daylight response, quiet night scenes, occupancy control, and separate controls for reception and waiting zones. | Reduce glare and visual noise. Favor comfortable luminance contrasts, accurate skin-tone rendering, and low-flicker operation. |
| Educational Lecture Hall | 300–500 lux | ≥ 0.60 | 3500–4000 K | ≥ 80 | UGR ≤ 19 | Combine even ambient lighting with separately controlled board, presentation, and audience zones. Coordinate fixtures with sightlines and projection surfaces. | Scene presets for teaching, presentations, examinations, cleaning, and video recording. | Prevent reflections on boards and displays. Maintain adequate vertical illumination on faces while allowing presentation areas to dim independently. |
| Planning note: The values above are practical design ranges for early-stage planning. Final illuminance, uniformity, glare, emergency lighting, energy, and controls should be verified through a project-specific lighting calculation and the applicable local standards. “Maintained illuminance” refers to the average illuminance expected to remain after depreciation and maintenance factors are considered. | ||||||||
Large spaces expose weak lighting decisions quickly. A warehouse aisle may look bright, yet work surfaces remain uneven. In 2026, evaluate energy performance beside visual comfort, not separately. Compare delivered lumens, wattage, maintenance access, and expected operating hours. High efficacy matters, but glare can reduce productivity and trigger costly adjustments. Use measured illuminance at desks, shelves, and walking routes. Ask for test data, not attractive estimates. During commissioning, record readings under occupied and unoccupied conditions. Results often differ from drawings. That difference deserves attention.
Tips: Divide the space into practical zones. Pair occupancy sensors with daylight harvesting near skylights. Set gradual dimming, because abrupt changes annoy occupants. Use schedules for predictable shifts, then allow local overrides. Smart controls should show faults, energy use, and sensor status in one accessible dashboard. Keep fallback scenes for network outages. They are boring, but useful. Review privacy settings before enabling people-counting features. Not every smart function earns its complexity.
Choose controls that facility staff can understand without specialist support. Open communication protocols can simplify future replacement, but verify compatibility in writing. Specify response times, maximum dimming levels, and manual override behavior. Train the maintenance team with a real fixture and control panel. A short walk-through prevents many service calls. I would also question predicted savings. They depend on cleaning, sensor placement, and user habits. A model may promise 60 percent savings; actual performance could be lower. Plan a three-month review, then adjust scenes, schedules, and sensor thresholds.
Large spaces demand lighting that survives dust, vibration, long operating hours, and changing layouts.
I begin with the task, ceiling height, maintenance access, and expected occupancy.
The U.S. Department of Energy reports that LED systems can use at least 75% less energy and last up to 25 times longer than incandescent lighting.
That difference matters in warehouses, factories, sports halls, and transport facilities.
Durability should include sealed housings, impact resistance, stable drivers, and documented temperature limits.
Flexibility means adjustable optics, dimming, occupancy sensors, and controls that support future zoning.
The International Energy Agency estimates that lighting consumes about 15% of global electricity. Efficient equipment helps, but poor controls can quietly weaken savings.
A high-efficiency fixture installed in the wrong position still creates glare and dark corners.
I have seen layouts look excellent on drawings, then fail after shelving changes. A pilot area is often wiser than a large immediate purchase.
Tips:
Compare total cost, not only purchase price. Include energy, cleaning, replacement, access equipment, and disposal.
Request photometric files and verify illuminance on site.
Use the Illuminating Engineering Society’s recommended levels as a design reference.
Keep spare components available, but avoid excessive inventory.
A simple control strategy may outperform a complicated one that staff cannot operate.
Measure results after installation, then adjust without pretending the first design was perfect.
Begin with the visual task, ceiling height, surface reflectance, and daylight direction. A large room needs zones, not one universal brightness level. Small details matter.
Office work commonly uses about 500 lux, while general circulation often uses about 300 lux. These figures are useful starting points, not final answers. Entrances, stairs, and information points may need brighter lighting.
Evaluate illuminance, uniformity, and glare together. A practical office target is often below 19 UGR. Check glare from seated and standing positions. Polished floors can create unexpected bright patches.
Layered lighting combines ambient light, focused task light, and controlled vertical illumination. A dimmer wall may feel calmer than a brighter ceiling. Recheck the design after adding screens, signs, shelving, and furniture.
Divide the space into practical zones and test a representative pilot area. Measure desks, shelves, walking routes, entrances, and stairs. Compare readings under occupied and unoccupied conditions. Drawings can mislead.
Combine occupancy sensors with daylight harvesting near skylights. Use schedules for predictable shifts and local overrides for unusual tasks. Set gradual dimming because abrupt changes can annoy occupants. Keep fallback scenes for network outages.
Choose dashboards that show faults, energy use, and sensor status clearly. Specify dimming limits, response times, and manual override behavior. Train staff with a real fixture and control panel. Keep it simple.
Look for sealed housings, impact resistance, stable drivers, and documented temperature limits. Consider dust, vibration, long operating hours, and maintenance access. Flexible optics and future zoning can support changing layouts. A high-efficiency fixture still fails visually when poorly positioned.
Include purchase price, energy, cleaning, replacement, access equipment, and disposal. Request photometric files and verify illuminance on site. Predicted savings may fall because of cleaning, sensor placement, or user habits. Measure again after three months.
Choosing effective Lighting Solutions For Large Spaces in 2026 requires a clear understanding of the area’s purpose, occupancy, ceiling height, natural light, and visual tasks. Start by defining whether the space needs uniform general illumination, focused task lighting, accent effects, or a combination of these. Compare available technologies and fixture types according to brightness, color quality, installation method, maintenance needs, and adaptability. A well-planned layout should provide balanced light levels, minimize glare and shadows, and support visual comfort across the entire environment.
Energy efficiency and intelligent controls are also central to modern lighting decisions. Dimming, occupancy sensing, daylight response, scheduling, and centralized monitoring can reduce energy use while improving flexibility. For long-term value, select durable fixtures with suitable protection, easy maintenance access, and adjustable performance. The best solution combines reliable construction, scalable controls, comfortable illumination, and realistic lifecycle costs, creating a safe, efficient, and adaptable large-space lighting system.

Boray Light